DIY Watercolor Cards

SONY DSC


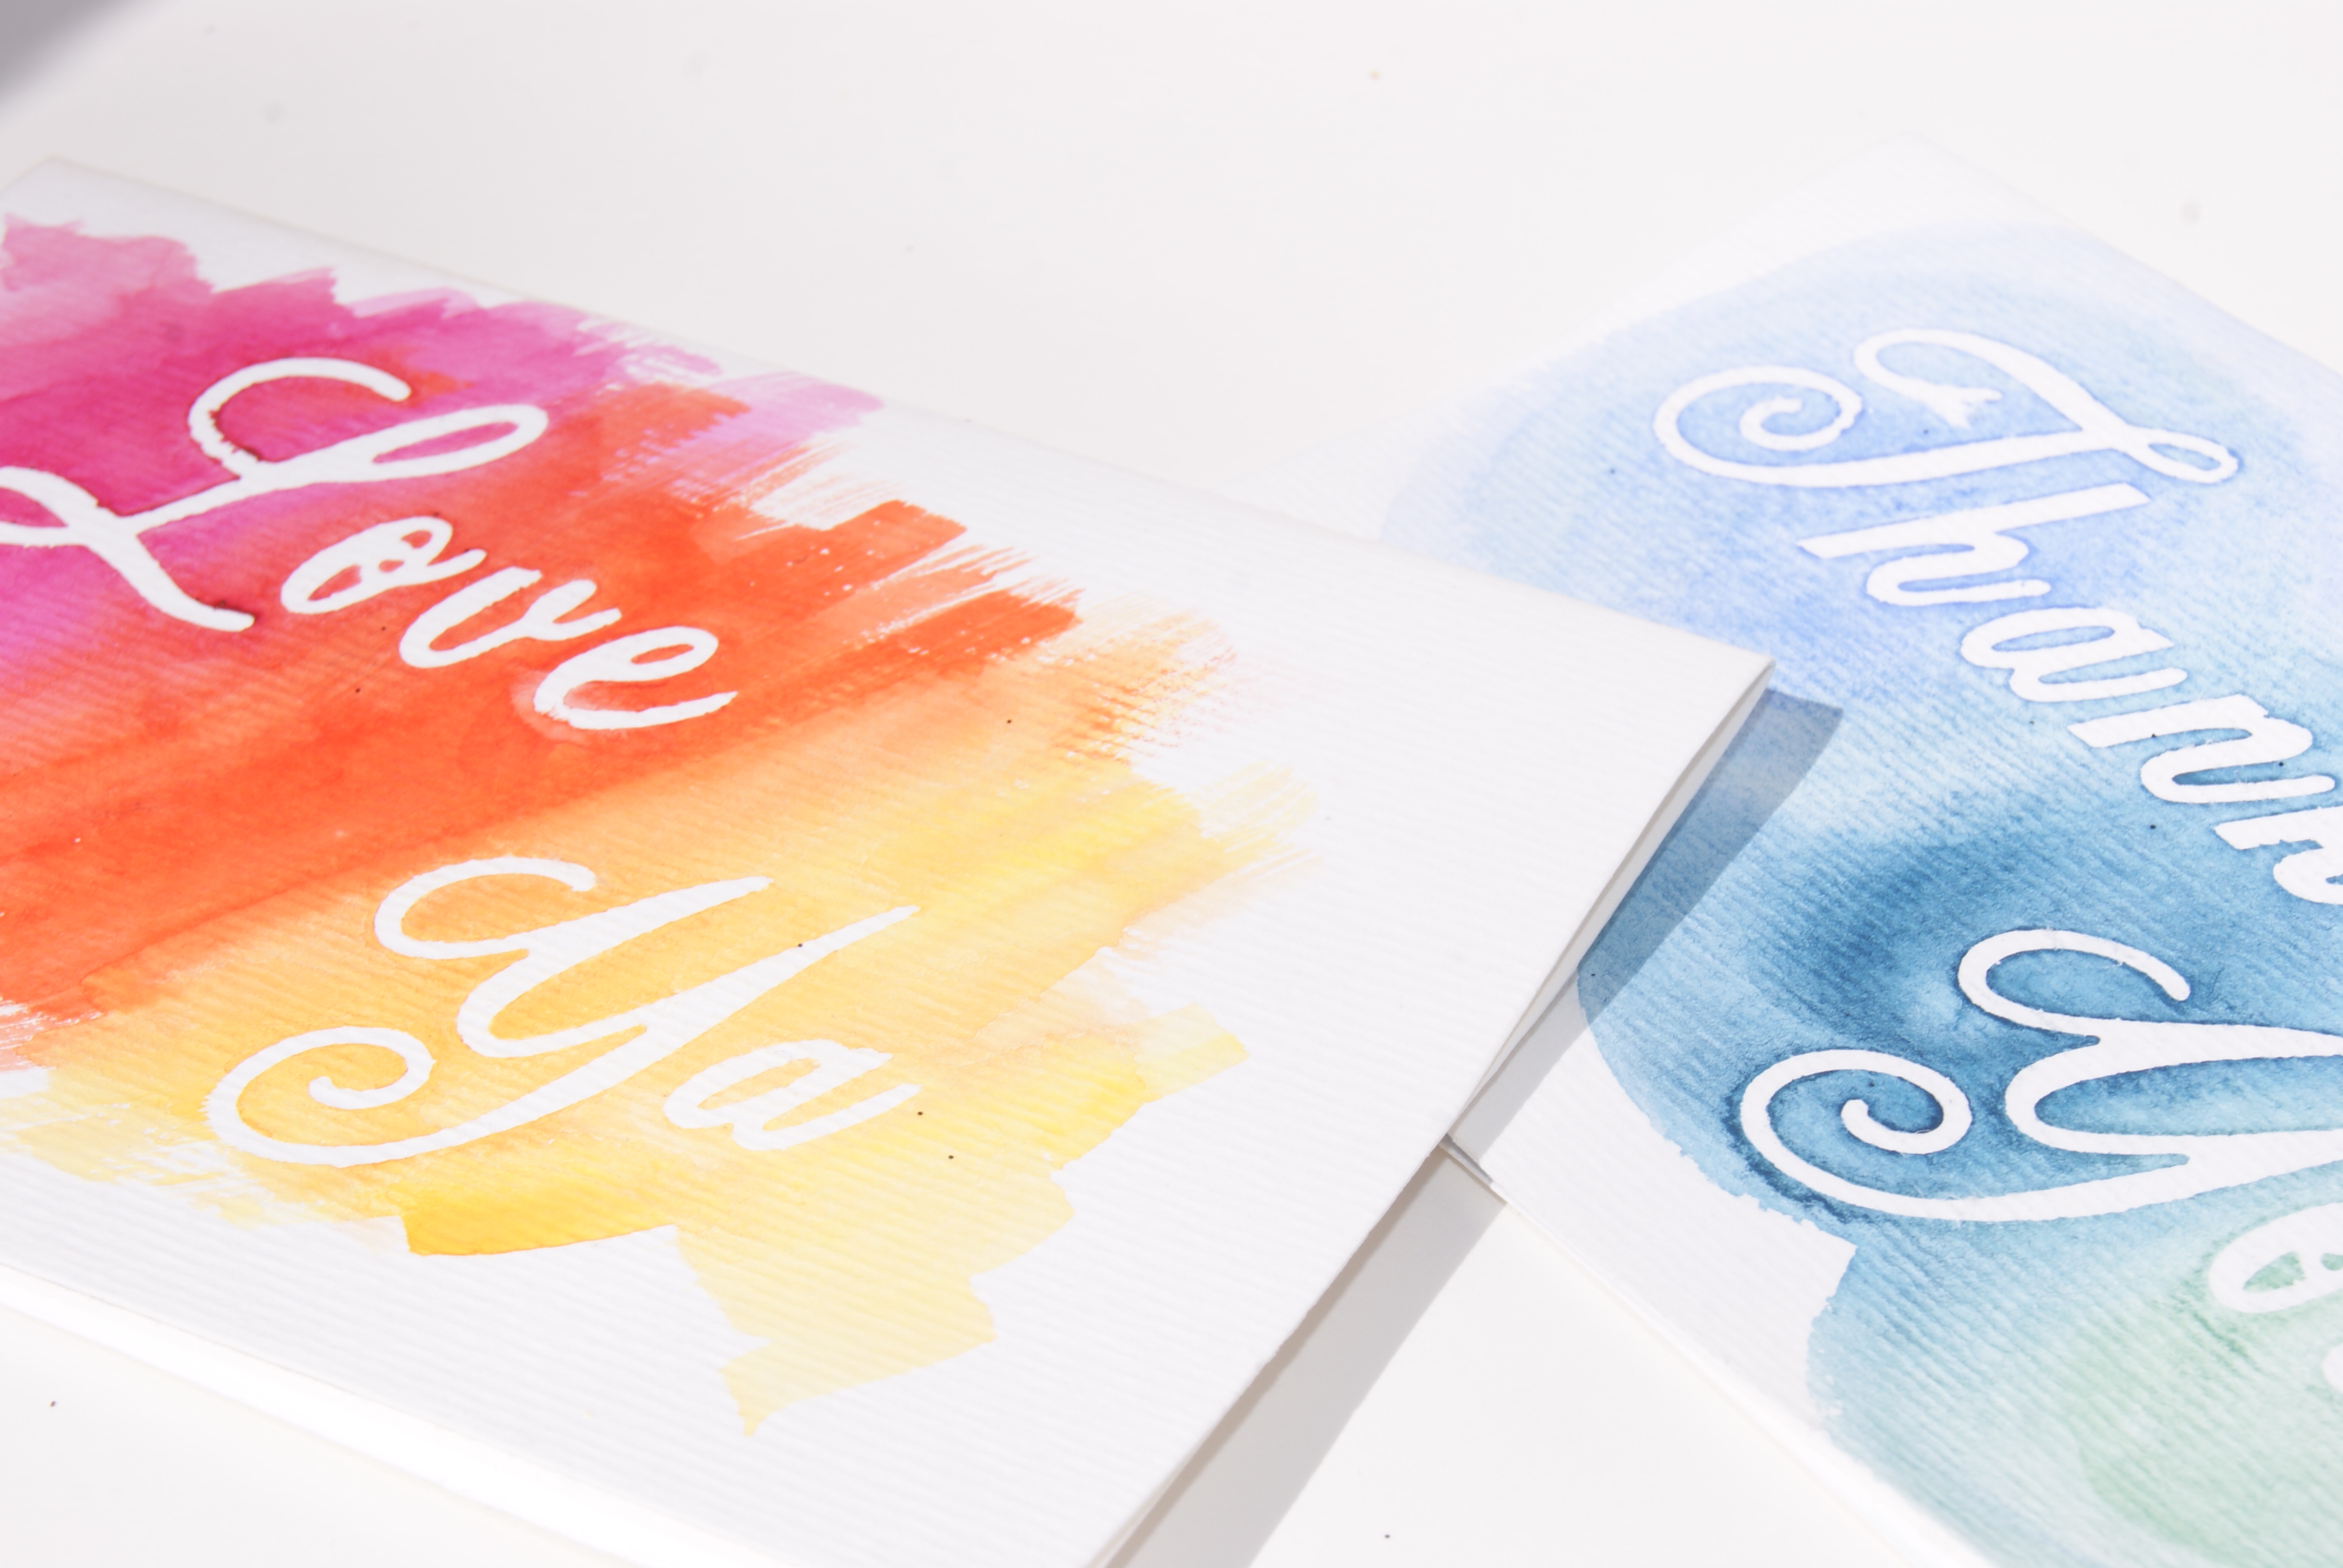
Recently I have become obsessed with watercolors! After getting a couple new colors from my local Hobby Lobby, I decided to create some fun cards and I thought I would share my step-by-step guide to making them.

These are extremely simple! You only need paper/cards that can withstand liquid (such as watercolor paper), watercolor paints, brushes, and lettering stickers.

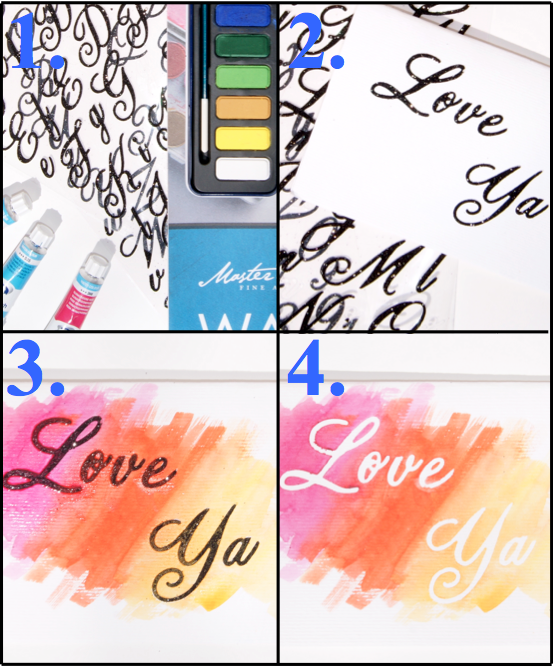
1. Gather your materials.

2. Write out the saying you want on the front of the card using the lettering stickers.

3. Paint over the stickers using any design and color pallet you want.

4. Wait for the card to dry; then remove the stickers.

5. Enjoy

Below is a visual step-by-step guide if you need a little more help.

Screen shot 2014-04-04 at 5.05.35 PM


Extra tips:

- make sure your stickers are firmly placed on the card to avoid paint leaking under your lettering

-you can’t really mix watercolor paints from a pallet, so if you want a fun accent color buy individual liquid watercolor paint

-make sure that you have covered all your lettering with paint so that your saying is clear

SONY DSC

April Fools!

Screen shot 2014-03-31 at 7.58.48 PM


Happy April Fools Day everyone! I hope you enjoy this day as much as I do. This year I had three people in mind to prank, so I decided to share the three simple and harmless pranks I planned.

SONY DSC


First I decided to pretend to spill a bottle of nail polish onto a favorite furniture piece. This is super simple. Just take a bottle of nail polish and spill it over wax paper. Once its dry, peel it off the paper and you are ready to go! Tip: Depending on the type of nail polish this might take days to dry naturally, so plan ahead.

SONY DSC


For my next target I decided to make their faucet water come out looking blood red. To do this all you need to do is unscrew the cap of the faucet (I just used my fingers, but a wrench/pliars might be needed). Then dry off the cap and the inside of the faucet with a paper towel. Place a red dye tablet (or the color of your choice), from the box of an easter egg dying kit, on top of the cap then screw it back on, and you are done! Tip: This effect only lasts 30s to a min. For a longer effect add multiple dye tablets

SONY DSC


Lastly I went with a classic. Simply putting an important item of your target’s and place it in jello. All you need to do is make the jello as instructed. Then let it cool about 1/4 of the way, so that it is somewhat thickened, and place in your item. I used keys, but any water safe item will do! Wait until it is completely thickened and place where they are sure to find it. Tip: Use a comical jello mold to take the prank to the next level.

Follow on Bloglovin Visit Kelsey McGinnis's profile on Pinterest.